Getting Started with Cocotb for absolute idiots #
Intro #
So you read all 2 of the free websites on SystemVerilog and you looked through the convoluted mess of documentation that is UVM - feeling dumb? Me too. I think cocotb is here to save us from the group of lunatics who cooked up UVM and the bright minds who thought the best way to verify HDL is with HDL.
What this tutorial is about #
This getting started tutorial is a short intro on how to setup iverilog, gtkwave, and cocotb. Once setup, we will go over how to do “easy” things like:
- drive a clock to your verilog module
- reset your verilog module
- write simple assertions in cocotb
In later tutorials, we will work towards more complicated things and maybe one day even figure out how to do everything the right way.
Helpful background/resources #
learncocotb.com is a great intro book.
Things to Install #
-
Install icarus verilog simulator for simulating verilog
- mac (with homebrew installed):
brew install icarus-verilog - windows: follow this guide
- linux:
sudo apt install iverilog
- mac (with homebrew installed):
-
Install gtkwave
- mac (with homebrew installed):
brew install --cask gtkwave - windows: follow instructions on main page
- linux:
sudo apt install gtkwave
- mac (with homebrew installed):
-
Make sure you have python 3.6+ installed
python --versionorpython3 --version -
Install cocotb
pip install cocotb
An incredibly dumb verilog module #
Let’s make a super simple module, called counter.v. It will increment the output by +1 on each clock. It will also have a reset signal.
counter.v #
module count_up(clk, reset, count);
input clk;
input reset;
output [3:0] count;
reg [3:0] counter;

always @(posedge clk)
begin
    if(reset)
        counter <= 0;
    else
        counter <= counter + 1;
end

assign count = counter;

// Dump waves
  initial begin
    $dumpfile("dump.vcd");
    $dumpvars(1, count_up);
  end
endmodule
For compatibility with gtkwave, you must include the last few lines at the end of any verilog module you’d like to view:
initial begin
    $dumpfile("dump.vcd");
    $dumpvars(1, count_up);
end
In a world without cocotb, you might write a simple verilog testbench that looks something like this:
count_up_tb.v #
module count_up_tb();
wire [3:0] count;
reg clk,reset;
count_up DUT(.clk(clk),.reset(reset),.count(count));

initial begin
    clk = 0;
    forever #5 clk = ~clk;
end

initial begin
    $dumpfile("testbench.vcd");
    $dumpvars(0,DUT);
    reset = 0;
    #5
    reset = 1;
    #5
    reset = 0;
    #15
    reset = 1;
    #5
    reset = 0;
    #200 $finish;
end

endmodule
running testbench with iverilog #
Let’s run the traditional testbench first to get a feel for using iverilog before we move onto cocotb. Cocotb is compatible with many simulators. As such, it will obfuscate away the call to iverilog, making life easier for us.
> iverilog -o count_up_output count_up.v count_up_tb.v
> vvp count_up
The first command calls iverilog, which is a compiler that translates Verilog source code into executable programs for simulation. We then run vvp for simulation.
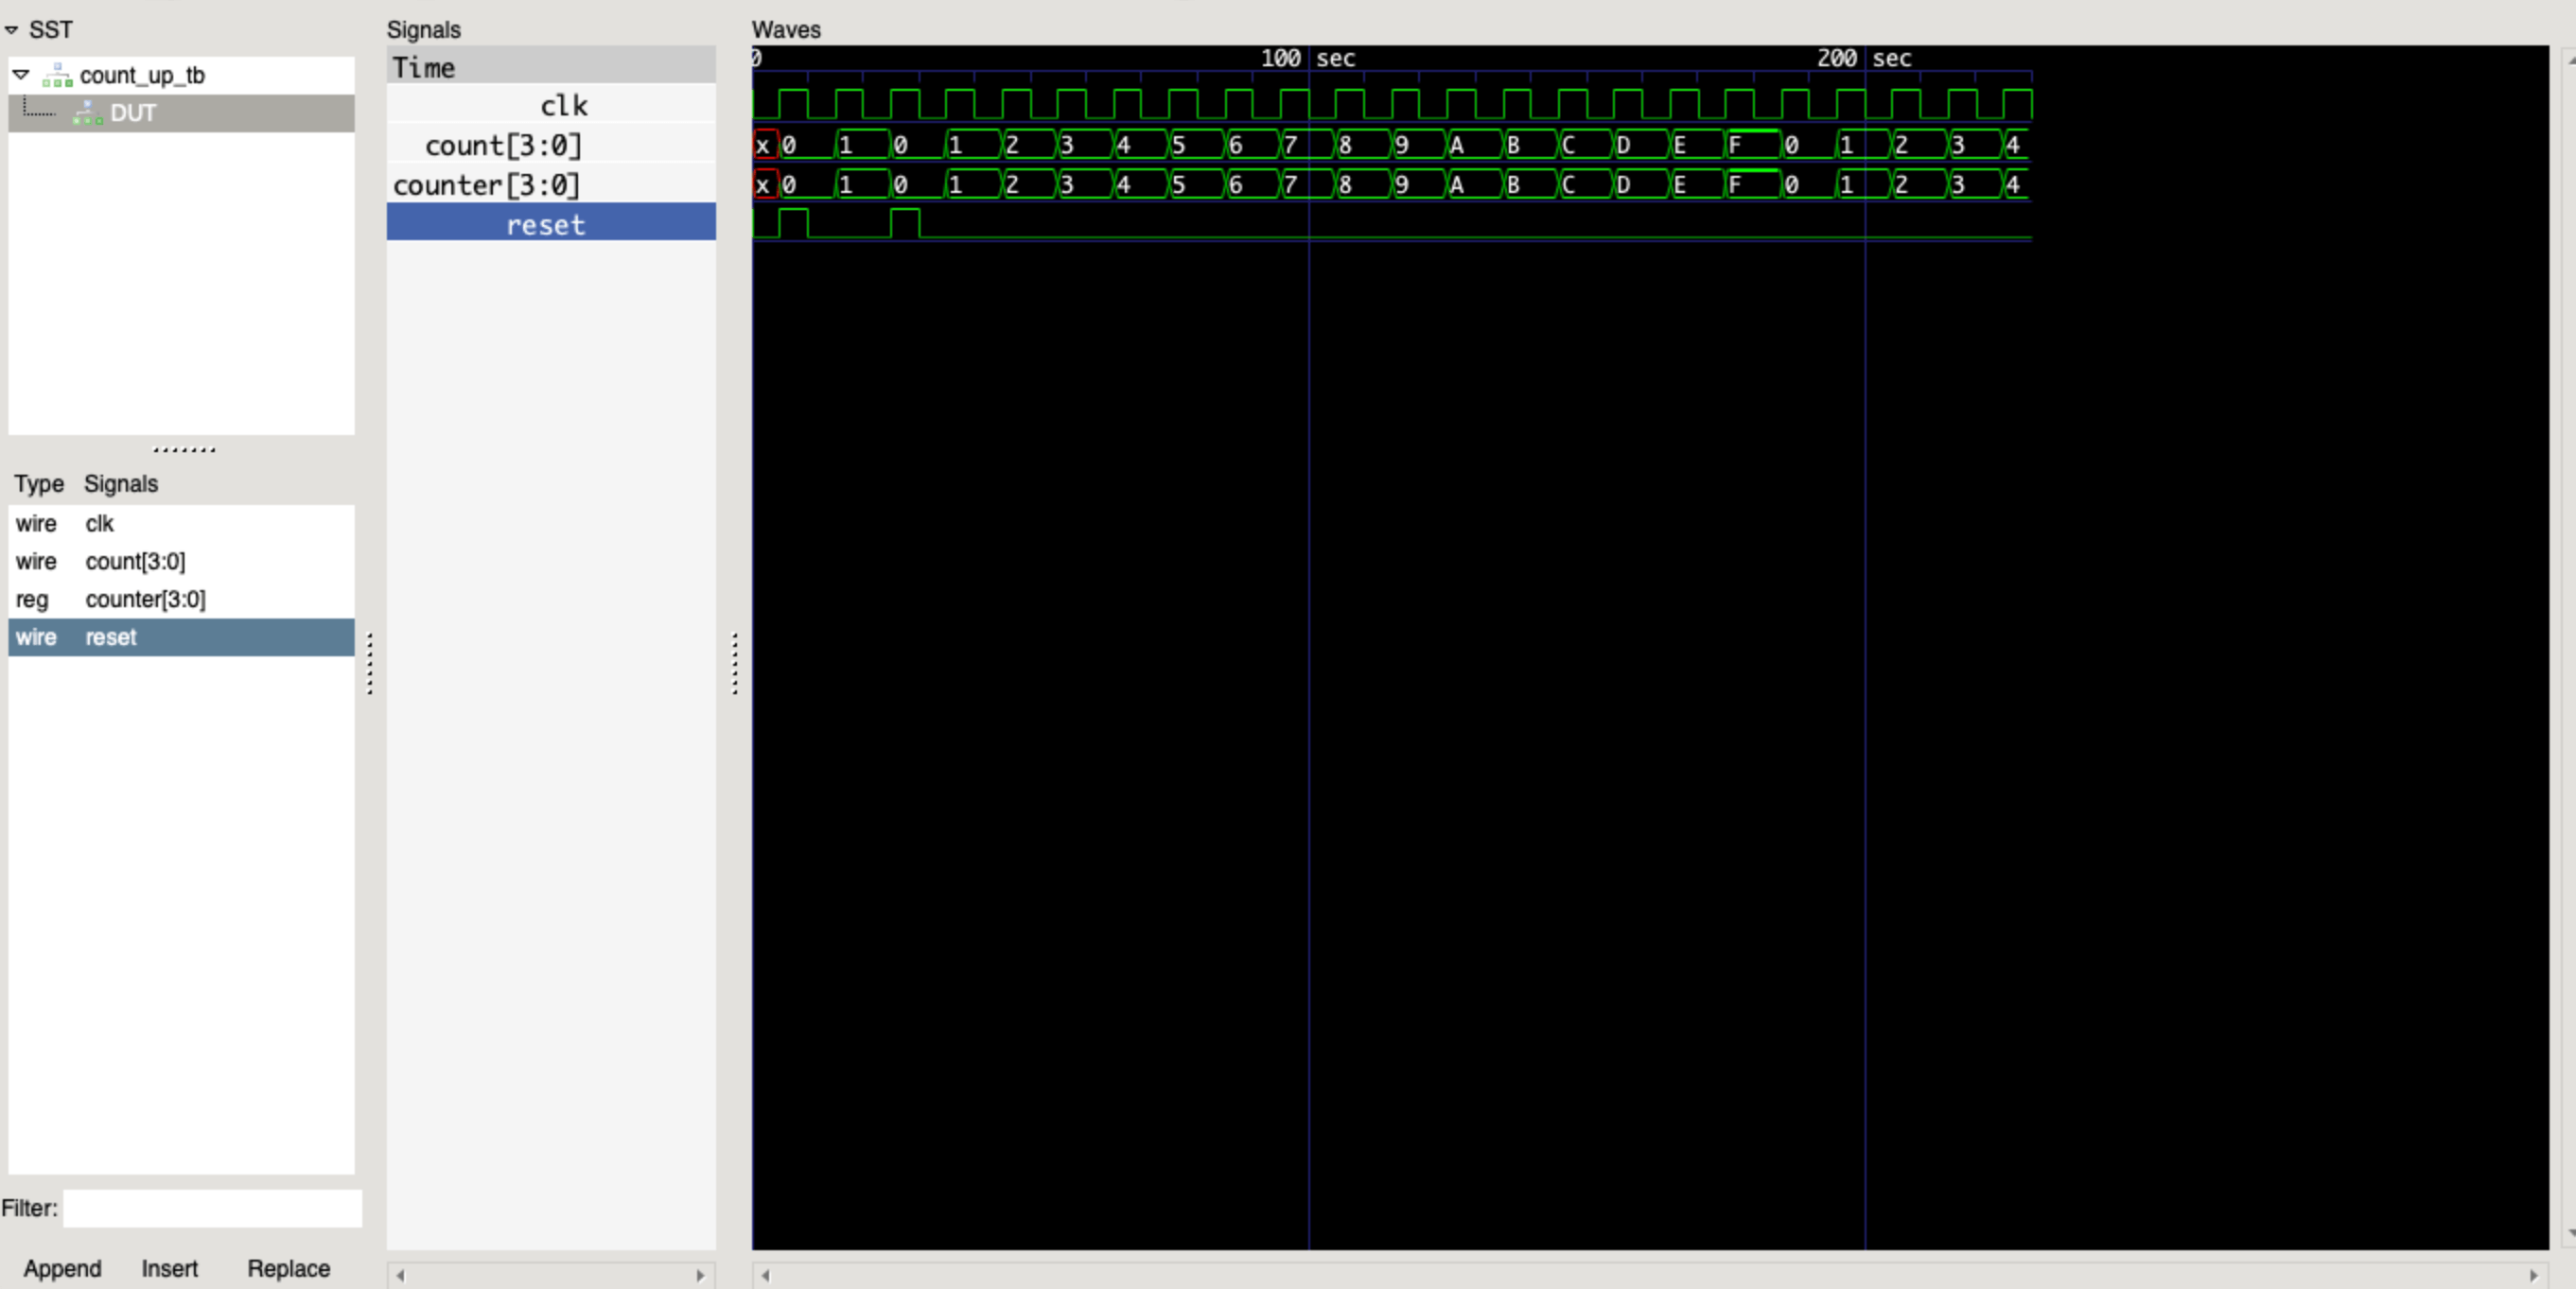
viewing results in gtkwave #
In the previous step vvp ran our simulation and placed the results in the count_up_output file. Our testbench drove our verilog module which dumped the signals to testbench.vcd (note: in count_up_tb.v we asked it to dump our variables to this file). This file can be opened in gtkwave. Steps:
- Open gtkwave
- navigate to file -> open new waveform
- open the
testbench.vcdfile - in the left side pane select DUT and then click on the signals below to add to waveform
EDA playground link to example #
you can view this example at eda playground
cocotb testbench #
Now lets write a similar (but more rigorous) testbench in cocotb. Our verilog testbench didn’t do any checks on the output signal and wasn’t very flexible. Let’s fix that in our cocotb testbench. The below snippet creates a test, sets up a clock as a coroutine, toggles the reset signal and then runs a small assertion check over 50ns.
testbench.py #
# Simple tests for an counter module
import cocotb
from cocotb.clock import Clock
from cocotb.triggers import RisingEdge

@cocotb.test()
async def basic_count(dut):
    # generate a clock
    cocotb.start_soon(Clock(dut.clk, 1, units="ns").start())

    # Reset DUT
    dut.reset.value = 1

    # reset the module, wait 2 rising edges until we release reset
    for _ in range(2):
        await RisingEdge(dut.clk)
    dut.reset.value = 0

    # run for 50ns checking count on each rising edge
    for cnt in range(50):
        await RisingEdge(dut.clk)
        v_count = dut.count.value
        mod_cnt = cnt % 16
        assert v_count.integer == mod_cnt, "counter result is incorrect: %s != %s" % (str(dut.count.value), mod_cnt)
Overview of the testbench.py file:
Just like examples in the cocotb official documentation - testbench.py runs sequentially, from start to end. Each await expression suspends execution of the test until whatever event the test is waiting for occurs and the simulator returns control back to cocotb.
the gist of how cocotb works #
-
dut.<signal name>.valueis how we read and write signals in our design in cocotb. We drive the reset signal viadut.reset.valueand we read the output count viadut.count.value. -
@cocotb.test()is a python dectorator. This one marks a function as a test. You can have multiple tests in a single file. -
cocotb.start_soon(Clock(dut.clk, 1, units="ns").start())is how we setup our clock to run as a separate coroutine. Don’t worry about the specifics of coroutines for now - just know we are driving the clock port via a separate coroutine baked into cocotb. -
async def basic_countits important to note that the test uses theasynckeyword. async functions can be scheduled to run concurrently andawaitfor other things to happen (giving control back to other processes) before continuing. -
at the end of the testbench we have a simple assertion denoted with
assert. This is similar to SystemVerilog assertions. This particular one just checks that the output is what we expect. If a failure occurs, it will report it back to us.
Creating a cocotb Makefile #
cocotb requires a makefile to do things like: tell cocotb where you verilog files are, which simulator you are using, and what your cocotb testbench is called. After setting up your make file, running your testbench is as simple as typing make.
# Makefile

# defaults
SIM ?= icarus
TOPLEVEL_LANG ?= verilog

VERILOG_SOURCES = count_up.v

# use VHDL_SOURCES for VHDL files

# TOPLEVEL is the name of the toplevel module in your Verilog or VHDL file
TOPLEVEL = count_up

# MODULE is the basename of the Python test file
MODULE = testbench

# include cocotb's make rules to take care of the simulator setup
include $(shell cocotb-config --makefiles)/Makefile.sim
running cocotb testbench #
Now type make wherever your makefile lives. After a short while your cocotb should run successfully.

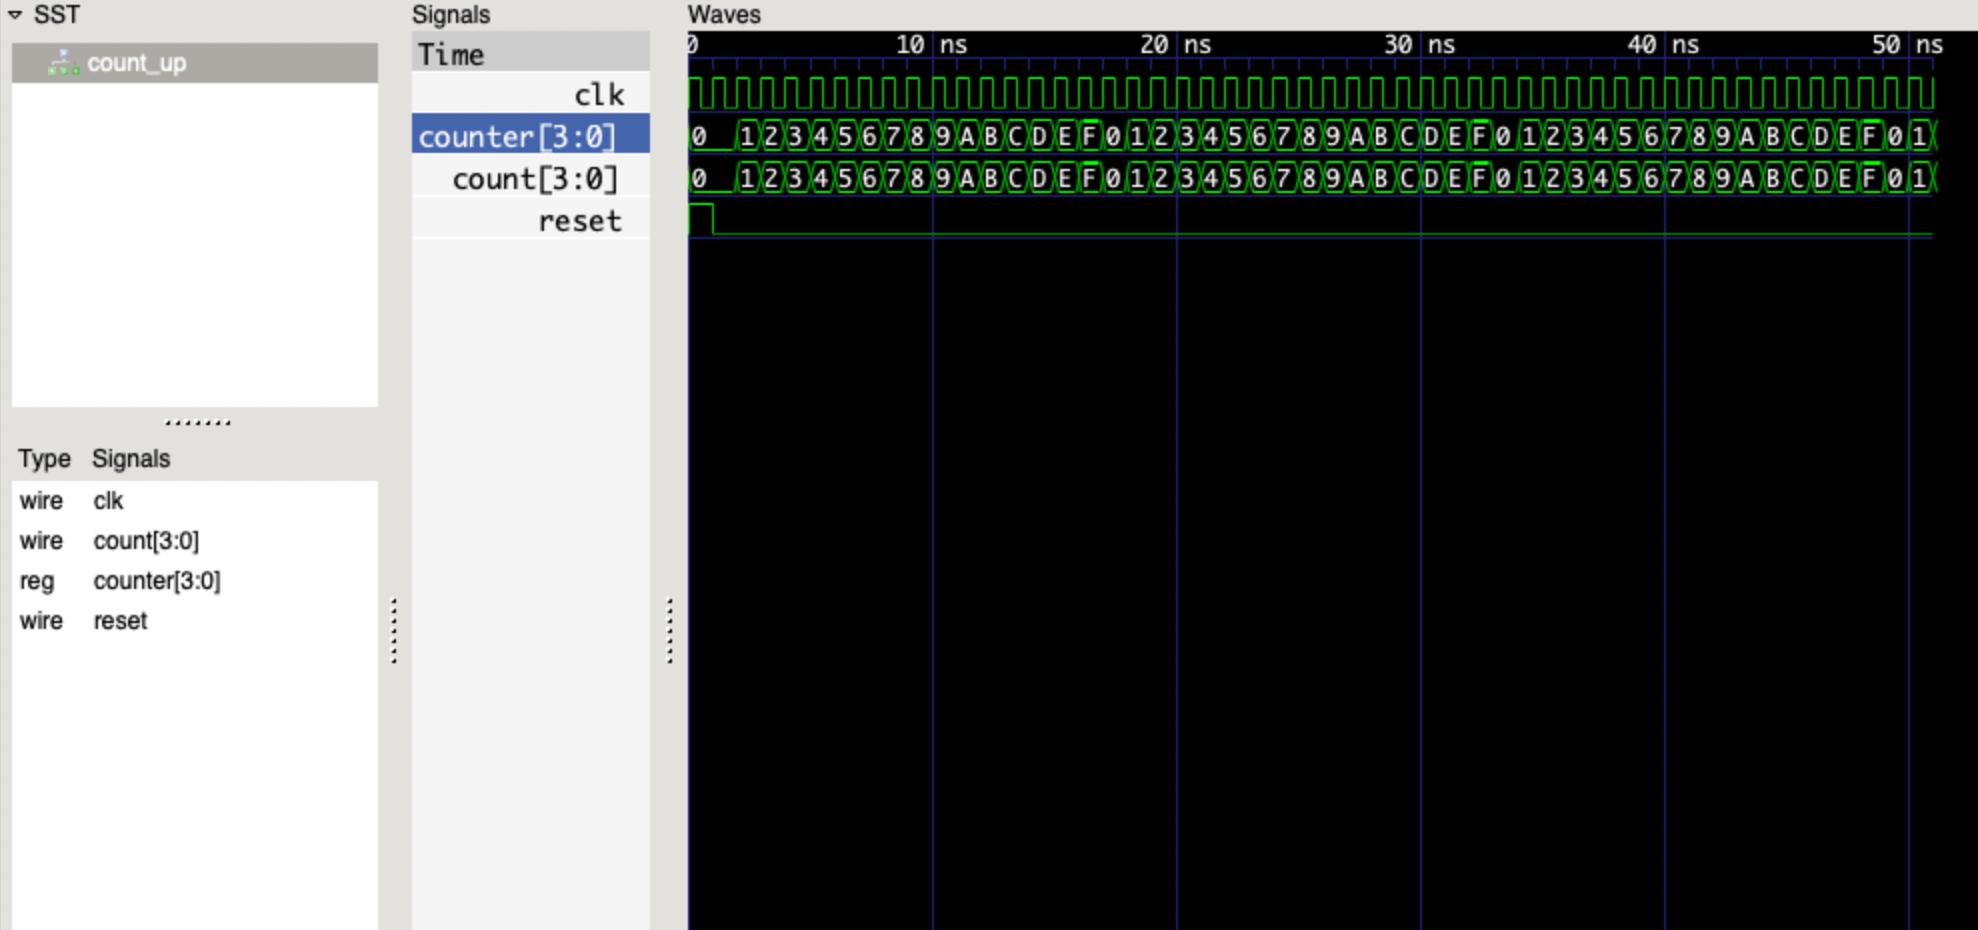
This simple example showcases some inner working of cocotb and our sequential processing of the testbench.
In the above waveform we see the clock runs for 52 ns, when our test loop was set to run for 50 ns. Note the reset loop above our main testing loop which runs for 2 periods before our testbench even started!
The order of events was as follows:
- we setup a clock to run as a coroutine (basically launching a separate
asyncfunction to run simultaneously to our test) - we set the reset port to high and proceeded to the first loop
- The await keyword halted our cocotb testbench, the simulator ran for a clock and then gave control back to the cocotb testbench where we once again awaited for the simulator to run for another period.
- Once it returned, our first loop (length 2) was over and we set the reset port to low
- we entered the second loop to run our actual test.
a small investigation of cocotb coroutines #
In the previous example the simulation ran for 52 ns. We ran the testbench sequentially from start to end. What if we had put the reset routine in its own function and started it as a coroutine? Let’s investigate. In testbench2.py we break out the reset routine into its own async function. In the basic_count test we then start the clock AND the reset routine as coroutines using cocotb.start_soon. We turned the assertions off for now, we only want to view an interesting aspect of the output waveform.
testbench2.py #
# Simple tests for an counter module
import cocotb
from cocotb.clock import Clock
from cocotb.triggers import RisingEdge

async def run_reset_routine(dut):
    for _ in range(2):
        await RisingEdge(dut.clk)
    dut.reset.value = 0

@cocotb.test()
async def basic_count(dut):
    # generate a clock
    cocotb.start_soon(Clock(dut.clk, 1, units="ns").start())

    # Reset DUT
    dut.reset.value = 1

    # reser the module, wait 2 rising edges until we release reset
    cocotb.start_soon(run_reset_routine(dut))


    # run for 50ns checking count on each rising edge
    for cnt in range(50):
        await RisingEdge(dut.clk)
        v_count = dut.count.value
        mod_cnt = cnt % 16
        #assert v_count.integer == mod_cnt, "counter result is incorrect: %s != %s" % (str(dut.count.value), mod_cnt)
If we view the output waveform in gtkwave, the entire test now only runs 50 ns! The run_reset_routine does, in fact, run concurrently with the basic_test function.
